I'm back today with an AECP class that I did for Level 3: Elements of Floral Composition. This was such a fun class with lots of interesting elements. I actually ended up creating three cards for this class and I tried to get as many of the class elements as possible in each card. With the description of each card, I will briefly mention how I used the different elements of the class.
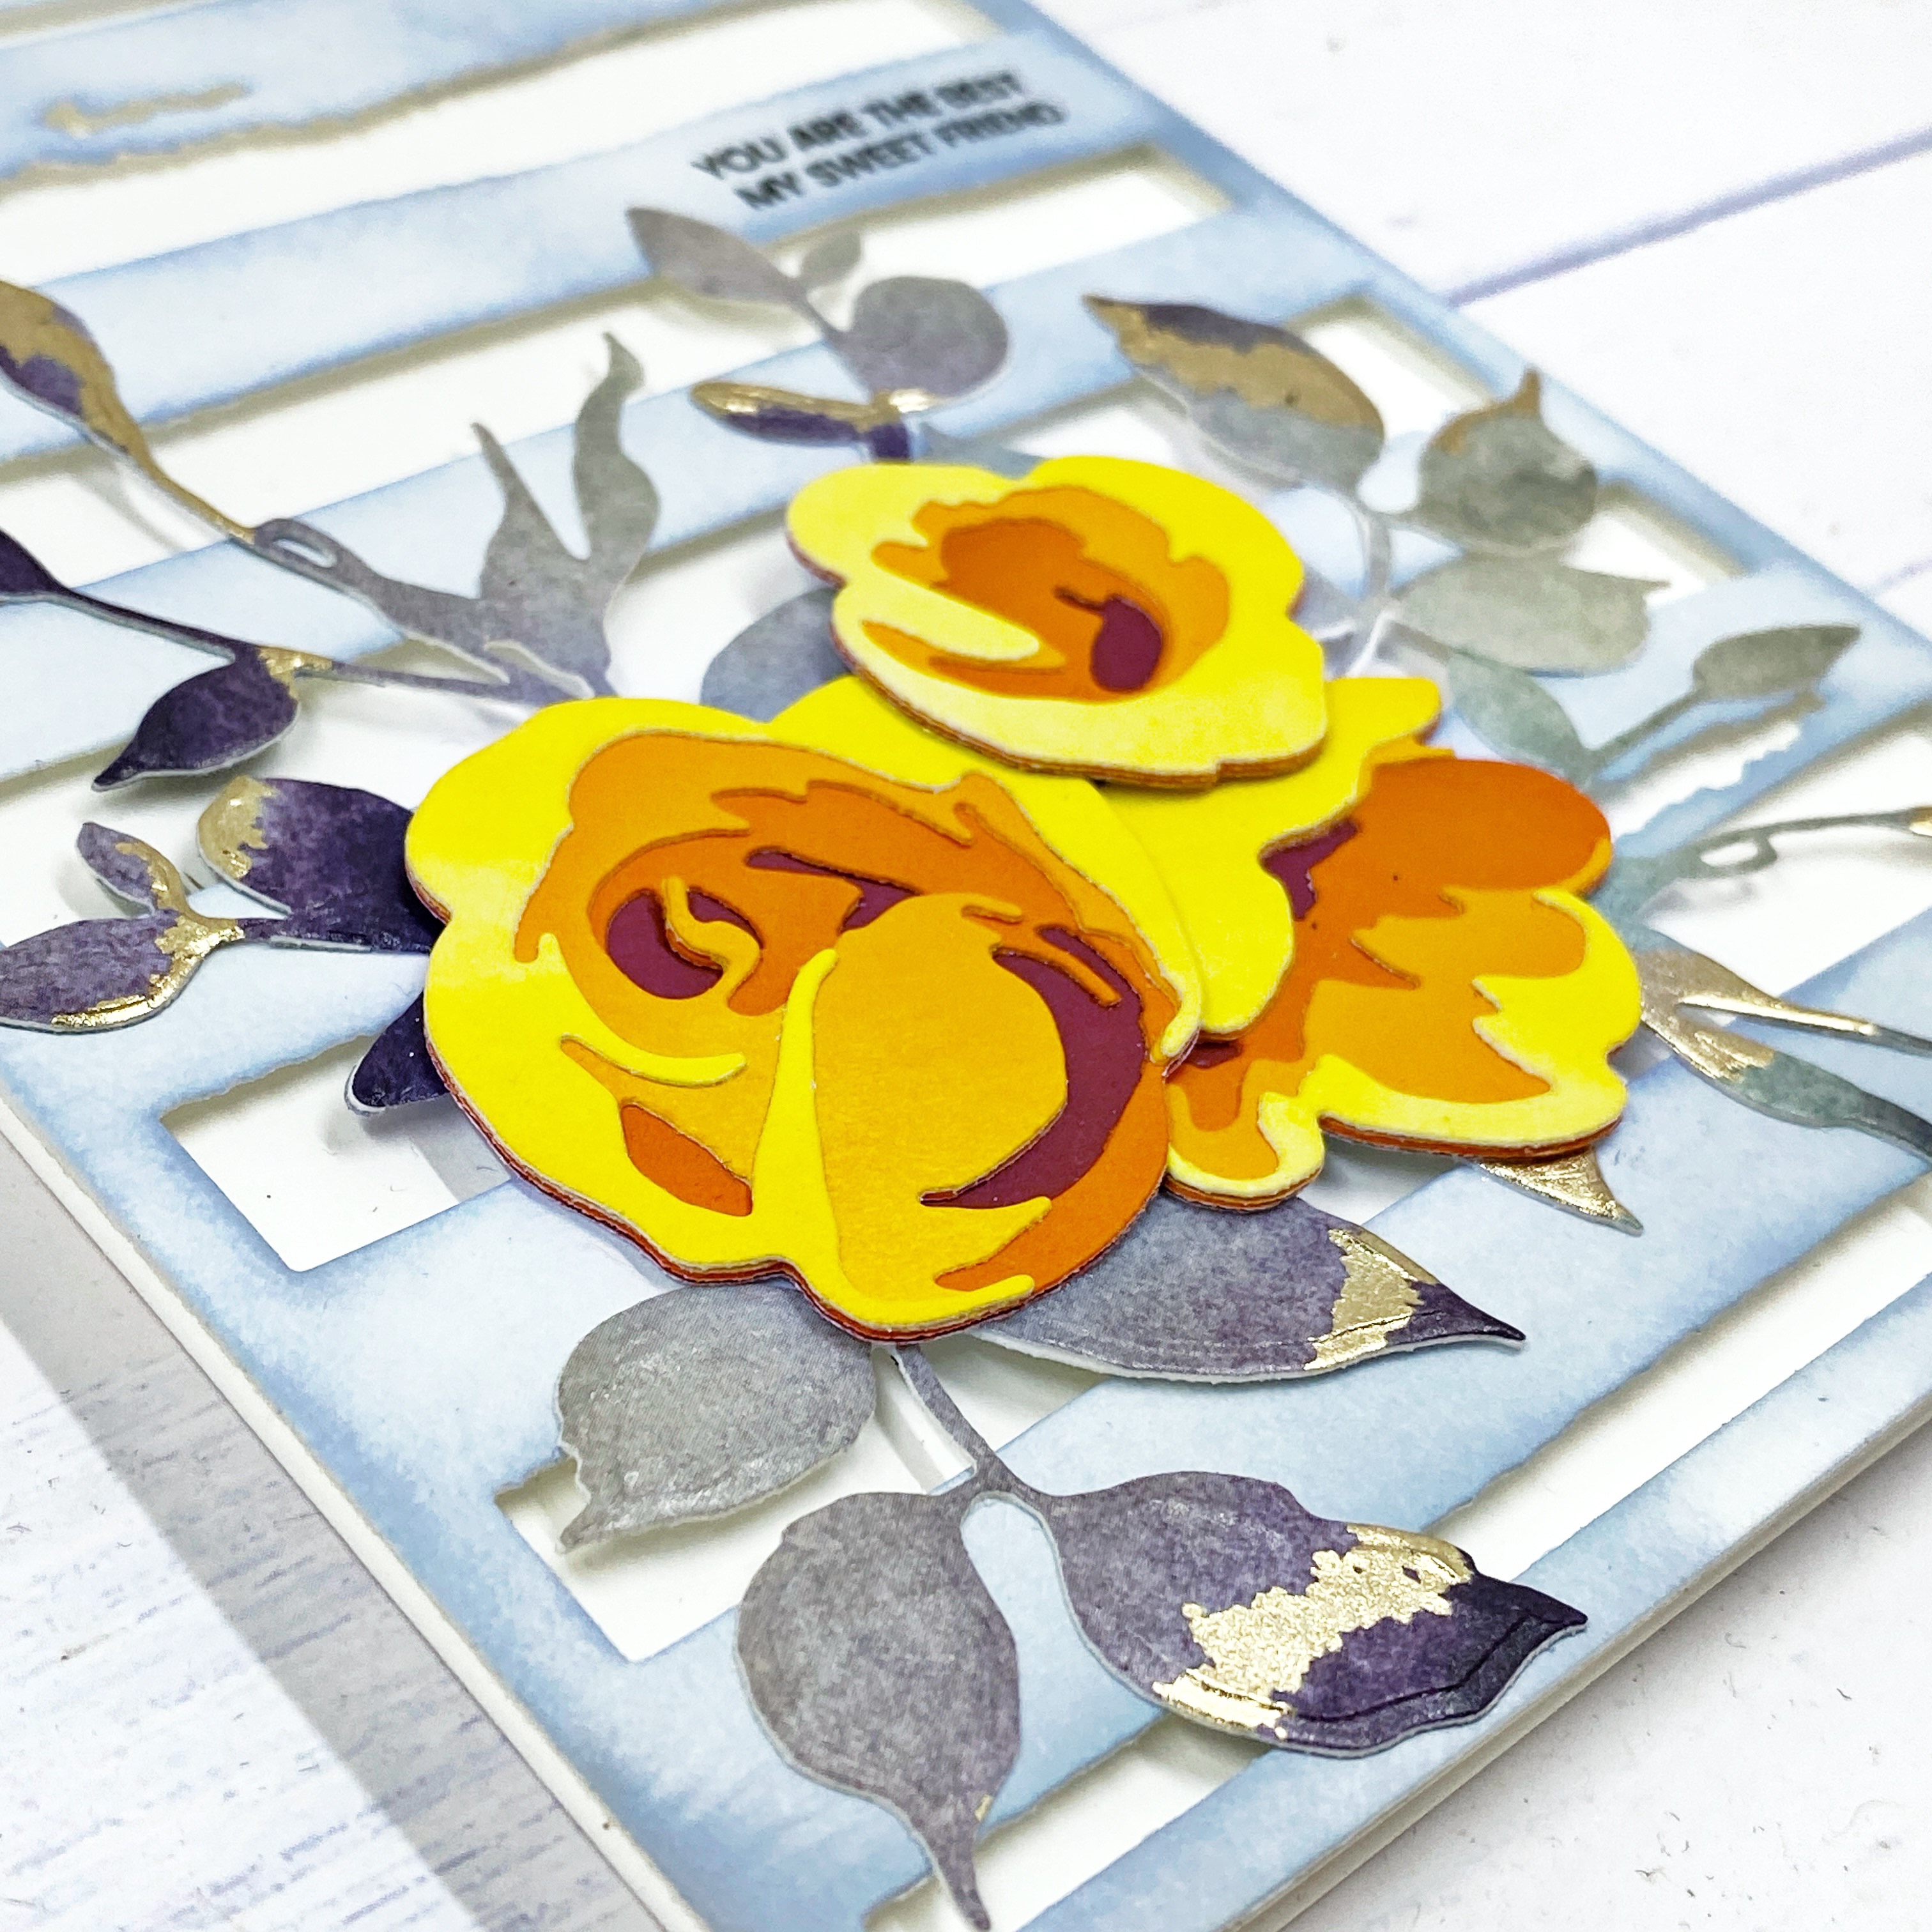
For my first card I used the Garden Picks 3D Die Set and die cut all the different layers from yellow, orange and red ink blended card stock. A fun idea I picked up in the class is to die cut the foliage out of washi tape, I used Gilded Ombre Washi tape. The background is the Watercolor Stripes Cover Die and I inked it up with some blue and grey inks.
Color: 60% blues/greys, 30% yellows/oranges, 10% gold Value: bright colored flowers and lighter toned foliage and background Texture: 3D Layering Die Form: Cover Plate adhered with foam tape Space: rule of thirds
I created my second card with the Hibiscus Garden 3D die set and used a mix of pinks and reds for the big flowers and yellows and oranges for the small flowers. In the background I added a subtle detail with the Color Block Triangle stencil in light pink. As a finishing touch I added silver metalic watercolor splatters.
Value: brighter flowers, lighter foliage and stenciled background
Shape: triangle
Texture: 3D layering die
Form: foam tape
Space: rule of thirds
And last but not least I created a third card for this class. I started ink blending my background in a light grey, dried it and then used the same grey with the Vintage Tapestry stencil for a subtle detail in the background. This stencil has two layers and I added the second detailed layer with glitter paste. The flowers are from the Sweet Rose Bouquet stamp set.
Color: 60% greys, 30% yellow, 10% glitter
Value: brighter flowers, lighter background
Shape: circle
Texture: glitter paste
Form: foam tape
Space: rule of thirds
I highly recommend this class. Not everything was new to me, but I definitely picked up some new ideas and tricks!
If you remember, in 2021 I started the Altenew Educator Certificate Program but along the way I got stuck and never finished it. Now 2 years later I finally decided to continue and I did my Level 2 final assignment.
To finish Level 2, I had to create 4 masculine cards in the themes birthday, anniversary, love/thinking of you and encouragement. I also had to pick 3 classes that I did so far and use them on my cards. The classes I chose are Let it Shine, In the Mood for Color and Beyond Basic Backgrounds.
Besides the 4 cards, I also had to do an altered item.
In this video I'm showing you how I created my cards and altered item. Below the video you can find pictures of my projects with a description of the products that I used.
Birthday card
For the birthday card I used the All Things Sweet stamp set and used some more masculine colors to stamp the images. The sentiment is from the Gradient Sunset stamp set and in the background I used the Splatter Hot Foil plate.
Anniversary card
The next card is the Anniversary card and I used the Gradient Sunset stamp set, along with the Splatter Hot Foil Plate.
Love/Thinking of You card
For this card I decided to use the 'missing you' sentiment from the Gradient Sunset stamp set, along with the Wooden Rowboat die set. Somehow these empty rowboats represent some sort of loneliness to me, which I thought would be a good match to the sentiment. In the background I used the Splatter Hot Foil Plate, but this time I used the negative print.
Encouragement
I love the All Things Orange stamp set for multiple reasons. First and foremost, the island stamp is almost a perfect image of the island Saba, where I live, and that cloud hanging over the top is almost always present. Second, this stamp set has some beautiful encouragement sentiments that you can use for a wide variety of cards. For this card I used the Splatter Hot Foil Plate's negative print again, as it represents water so well.
My dog Blink has some really close friends that she had to give some Christmas presents. So I decided to make some small bags with dog treats and create some cute Christmas dog tags to go with them.
I used the Stitched Arch Dies from Sunny Studio Stamps for the base of my tags. This die set also has a separate little hole die so that you can die cut it wherever you want it in your tags, to pull the twine through. This adorable doggie was a special edition from Sunny Studio this year: Dashing Dachshund.
The patterned paper and sentiments are from Lawn Fawn.
The presents were a success, so I guess we will have to come up with something again next year ;)
These last 2 months of the year are always so chaotic, the very little free time I have I spend on creating cards and updating my blog is not really happening. So, I decided to show the rest of the Christmas cards that I have made here in one blog post. In between I also made a few other cards, like birthdays, but I will leave those for a separate post.
These 3 cards were made during the online class 'Snowball Fight' by Jenn Shurkus, with all Lawn Fawn products. If you're not familiar with her classes, you should definitely go check them out. She teaches in person classes and online classes. Since I live nowhere close to where she teaches in person, I'm so thankful for her online classes! It's in the comfort of my own home and still feel like I'm hanging out with like-minded people. Every time I learn something new and she gives me a different perspective on how to use my stamps.
And the last card is made with an adorable stamp from Unity Stamp Co, by Graciellie Design.
I do need a little break from making Christmas cards, but sometime in January I'll start making them again. I love to join in Get Cracking On Christmas, an initiative by Jenn Shurkus, where you're encouraged to make Christmas cards all year long to take the pressure of the last couple months of the year. I've been doing this for 2 years now and I love it!
Thank you for stopping by and I want to wish you a wonderful Christmas!!